I love to teach. I love to provide information that helps people excel.
As organizer of a digital accessibility meetup, I strongly believe that recording our meetup events (where appropriate) benefits everyone, both those that attend in person, as well as those digesting the video stream.
As many meetups don’t do this, for various reasons, I thought I’d share information on how we stream and record our meetup events in hopes that a few others might move from consideration to actual implementation.
Now, please note that I am not an expert at live video streaming, video recording, etc. I only know what I know and have already experienced. If you know something that I don’t and have some knowledge to share, please share in the comments. I would love to take what we are doing to the next level.
The Setup
This is a relatively poor man’s setup. The only enhancement I’d added to “free” is purchasing a lapel microphone for improved audio (see below). The setup is:
- A laptop with built-in camera
- Wi-fi
- A YouTube Account
- Proper lighting
- Presentation – dark background/light foreground
- External Microphone
- Miscellaneous
Laptop with Built-in Camera
Most laptops have a built-in camera for video conferencing, Skype-ing, Facetime-ing, whatever your pleasure. The higher the resolution, the better. It’s best to test this out first to ensure what you have will do the job. We use the cam on a Macbook Pro, placed about twelve feet or more from the speaker and screen. It’s a good idea to segregate the laptop from other attendees. I once had an attendee writing notes, creating vibration. One thing that can curb this (if unavoidable) is placing the laptop on a towel to soak up any vibration.
Another thing you’ll need to check for is “line of sight” interferences, such as someone unexpectedly sitting in front of the camera line, especially with a large hair style. Again, good to cordon off the line of sight to ensure an unobstructed view for the camera.
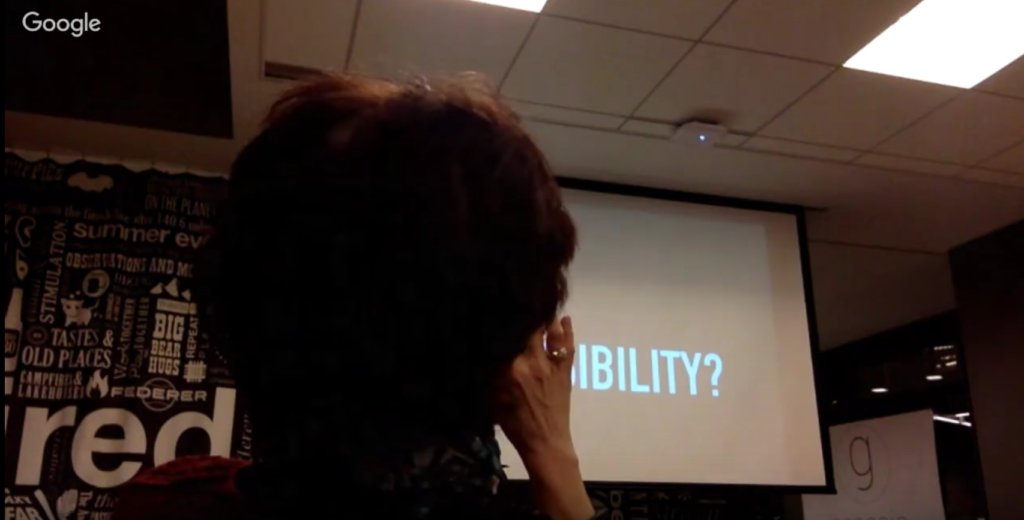
In the example above, I luckily had a back-up plan.
Wi-Fi
Do not assume that you will have wi-fi. Make sure there will be wi-fi available. Additionally, if possible, make sure of the quality of the wi-fi.
We’ve experienced various degrees of luck with wi-fi at our venues. We’ve had wi-fi drop out then in, even after hours. We’ve had other venues where we have been lucky enough to leverage a higher speed wi-fi network for the stream and presenter than other attendees. And at other venues, it’s been almost non-existent (thank goodness for my hotspot, sad for my data plan).
When working with a venue, ensure there’s a good wi-fi network to connect to. Actually test it in advance to ensure this. There’s nothing like the disappointment of a presentation warbling or dropping off, or the audio dropping off, especially when you’re dependent on the quality of the audio for (live) captions. If possible (as mentioned above), see if you can access an exclusive network for the stream and presenter, and a general network for attendees.
YouTube Account
You’ll want to create a YouTube account for your meetup, to host your live streams and/or recordings. Once the account is created, go to “My channel,” then select “Video Manager.”
Under the left-side Creator Studio panel, select “Live Streaming,” then “Events.”
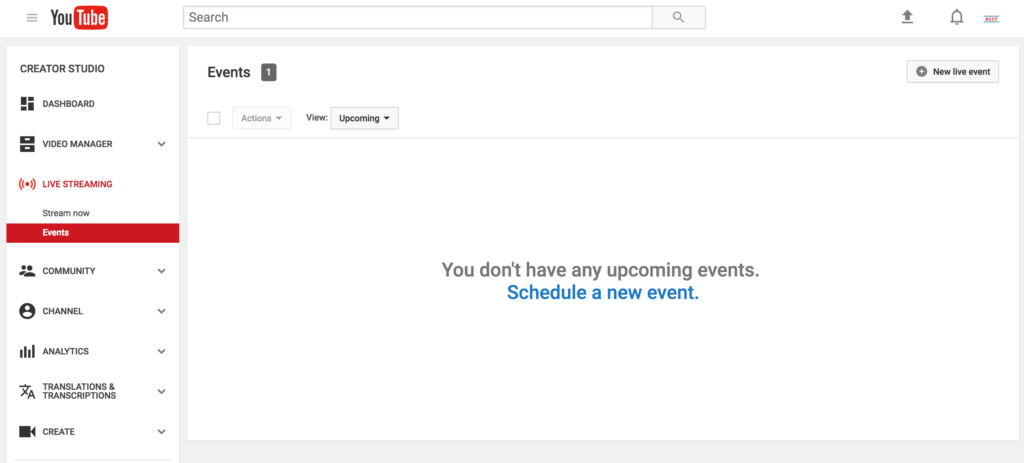
To create a new scheduled event, select the “New Live Event: button.
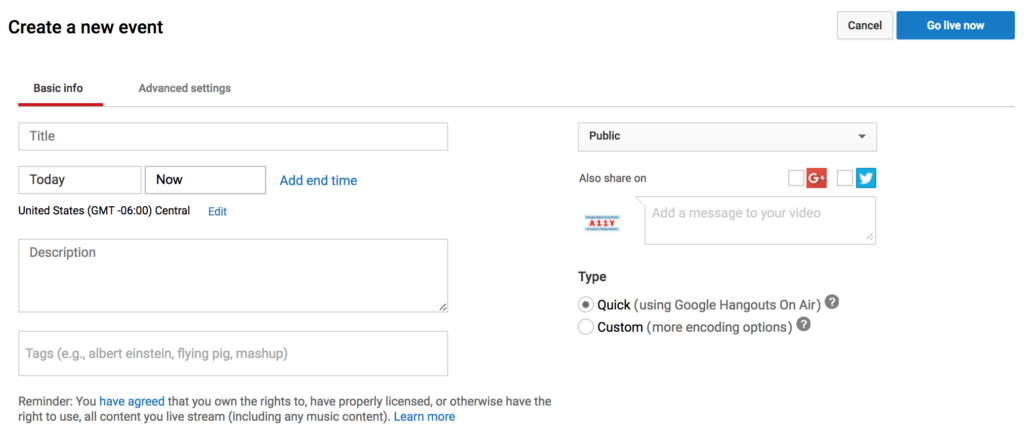
Enter the title for the stream/recording, and the date/time. Note that the time is not when the recording will function, it’s merely for scheduling and announcing. It’s a good idea to schedule the recording well in advance and use the URL for promotion. Enter a description, tags (so the video can be found via search), whether the recording should be public, etc. The important option is “Type;” select “Quick using Google Hangouts On Air,” This option is satisfactory and and prevents you from having to worry about codecs and the like. However, if you ever plan to display captions on screen with the stream, you will need to select the custom options.
Select the Advanced settings tab, and modify any information here. When finished, select the “Create event” button.

Now, once you’re ready to start the stream/recording, return to the “Live events” screen and select the “Start Hangout on Air” button for the event you wish to start.
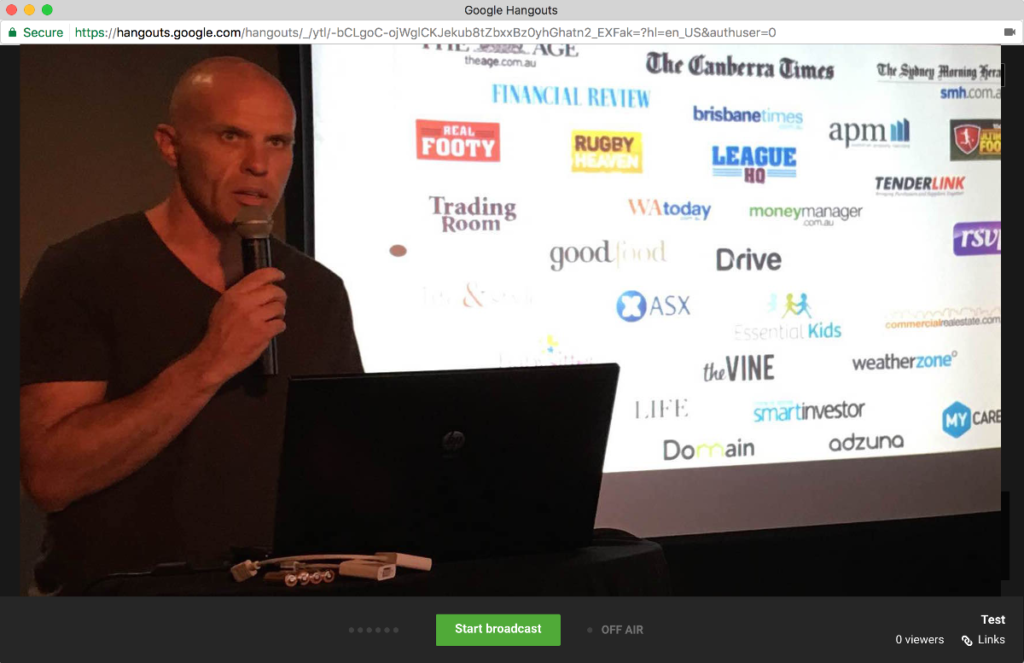
When you’re ready, select the “Start Broadcast”
Proper lighting
We’ve run into this issue a few times.
We had all the lights on … and the screen was difficult to see. We turned the lights off … and now the speaker couldn’t be seen on the stream/recording, due to the contrast between the dark room and the bright screen. It takes a balance. If you have enough control, having some light on the speak, yet dark in the vicinity of the screen or monitor.
Presentation – dark background/light foreground
This has two benefits. One, it reduces contrast between screen/monitor and speaker (see above). Two, based on feedback from a couple attendees, the dark screen, light text reduces glare, and makes it easier to read in many cases. I always ask presenters to adopt this whenever possible.
External Microphone
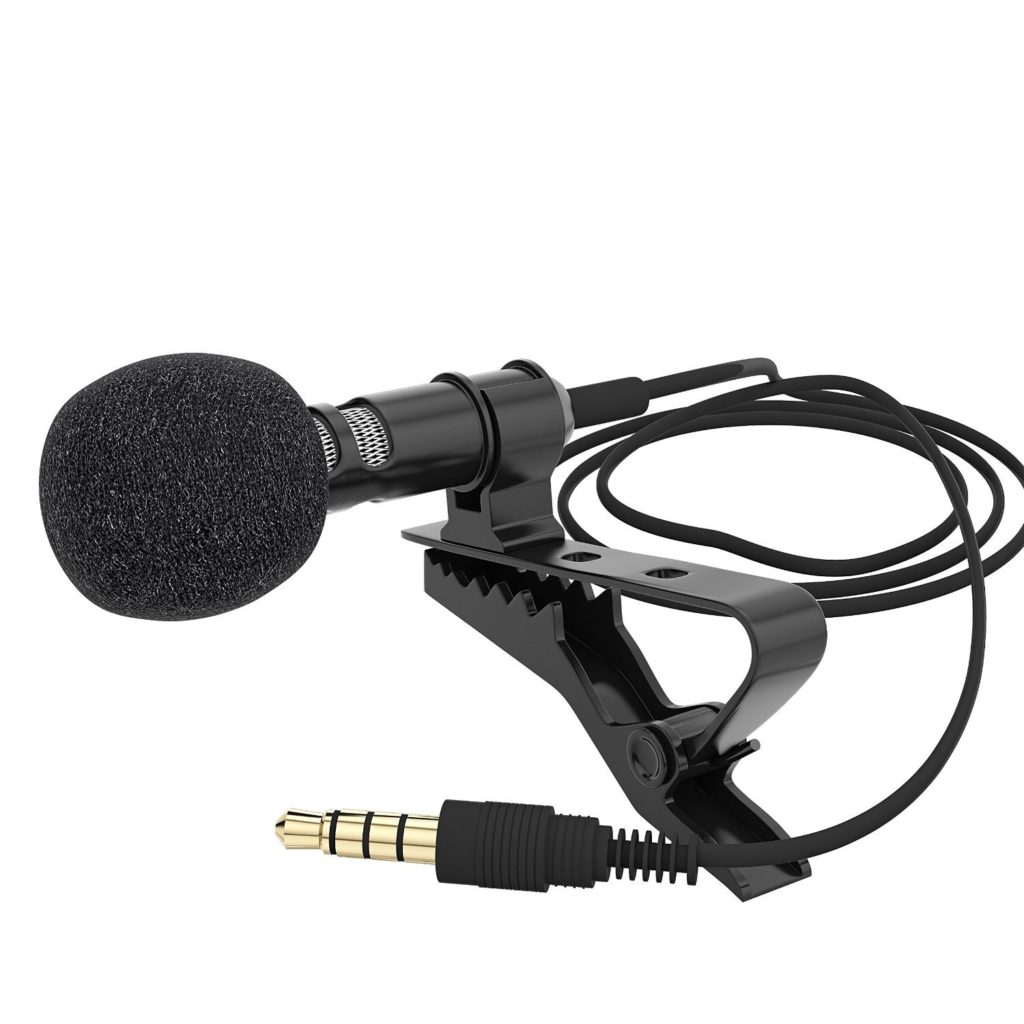
One of the best investments I have made has been a lapel microphone. A apel microphone placed on the presenter provides the focus on the presenter needed to get quality audio, not only for the video, but also for live captions. The microphone is plugged into the earphone jack on the Macbook Pro (not intuitive to a lifelong PC user).
The microphone was a $15 investment and an extended cord was another $13. $28 well spent.
Miscellaneous
I’m a bit of a control freak, especially when it comes to the quality of the meetup events. For recordings, to ensure I don’t miss anything, I record from an additional second location via an iPad. I use this recording in case something goes wrong with the Hangout recording (like the women’s head in the line of sight from above). I also use it to mix in in post-event video editing. Yes, this is over and above. But video editing is an interest of mine, so, the editing is an opportunity for me to play around.
Besides asking for the deck from the presenter for the attendees, I also use the slides in the video editing as well.
Well, that’s about it. I hope you found this useful. I also hope the simplicity of the setup will encourage you to record your informative meetup events as well.
